Introduction
I’ve been working on a lot of projects involving MediaTek bootloaders lately, and they’ve been getting more attention over time.
Because of that, I thought it would make sense to put together a proper guide on how to reverse engineer MediaTek LKs, while keeping it as beginner friendly as possible and adding some visuals along the way.
I’ve written a few guides on this topic before, but I’ve improved quite a bit since then and started using some new techniques that make the process easier.
So instead of leaving everything scattered, this guide brings it all together in one place (or tries to, at least).
Requirements
This guide assumes you have a computer and at least some basic common sense. Other than that, you’ll need:
Install everything from the official sources linked above, and make sure your Java environment is set up correctly for Ghidra.
I’m not going to cover installation here since it’s straightforward, and you can always look it up if needed.
Background
MediaTek uses a bootloader called LK (Little Kernel) on most of its Android devices, although some platforms may use alternatives like u-boot.
LK typically acts as the third-stage bootloader and runs in S-EL1 (Secure EL1) on ARMv8 devices, and in PL1 (Supervisor mode) on ARMv7 devices. If we follow ARM naming conventions, this would be BL33.
There are two main variants of LK:
-
Legacy LK (v1.0): Found on older devices. These are typically paired with V3 (legacy) or V5 (XFLASH) DA protocols. LK runs in ARMv7 mode, even on SoCs that support ARMv8.
-
Modern LK (v2.0): Used on newer devices, typically paired with the V6 (XML) DA protocol. It runs in ARMv8 mode with the MMU enabled, inside a virtual memory space.
The LK image you find on a MediaTek device is packed and contains multiple sub-partitions. The exact number depends mostly on the LK variant.
Legacy LK usually includes lk and lk_main_dtb, while modern LK includes lk, bl2_ext, aee, lk_main_dtb, and lk_dtbo.
Each partition has its own header defining size and other runtime parameters, and in most cases also includes two associated certificates (cert1 and cert2) used for verification as part of the secure boot chain.
This is pretty obvious (and, in my opinion, a bit stupid), but some people still get confused: the file extension does not really matter.
You can list the sub-partitions in your image using lkpatcher:
$ python3 -m lkpatcher lk.bin --list-partitions[INFO] MediaTek bootloader (LK) patcher - version: 4.0.3 by R0rt1z2[INFO] Successfully loaded 6 patches in 4 categories[INFO] Loaded image from pacman.bin with 5 partitions (version 2)
Partitions in bootloader image:----------------------------------------1. lk (927248 bytes)2. bl2_ext (659112 bytes)3. aee (885416 bytes)4. lk_main_dtb (289015 bytes)5. lk_dtbo (164385 bytes)----------------------------------------Instructions
Depending on the image you have, the exact steps may vary, but the general process is similar.
Extracting the actual LK binary
Start by extracting the actual lk sub-partition from the image. You can do this with lkpatcher:
$ python3 -m lkpatcher lk.bin -d lk[INFO] MediaTek bootloader (LK) patcher - version: 4.0.3 by R0rt1z2[INFO] Successfully loaded 6 patches in 4 categories[INFO] Loaded image from lk.bin with 2 partitions (version 1)========================================Partition Name : lkData Size : 1246148 bytesAddressing Mode : 0xffffffffMemory Address : 0x4c400000========================================[INFO] Successfully dumped partition lk to lk_lk.binThis will give you a file called lk_lk.bin, which is the actual LK binary we want to reverse engineer.
Make sure to note down the Memory Address from the output, as this is the base address where the binary is loaded in memory. This will be important later during analysis.
Also note down the version of the LK (v1.0 or v2.0) as this determines the architecture and some of the techniques we’ll use later on.
For version 2 (modern) LKs, you might see a very large memory address (e.g. 0xffff000050f00000), which is completely normal, don’t worry about it.
Loading the Binary in Ghidra
If you haven’t already, create a new Ghidra project. Give it a name and choose where to store it.
Drag and drop the lk_lk.bin file into the project window. This will open the “Import File” dialog.
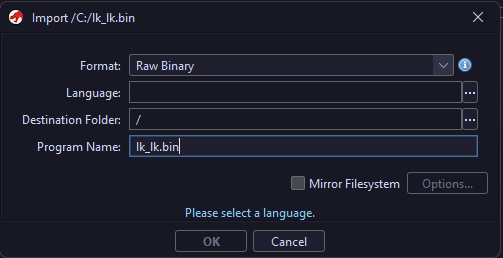
The only thing we need to configure here is the Language option. Everything else can stay as is.
Click the three dots next to the Language field to open the “Select Language” dialog. From here, choose the correct architecture for your binary:
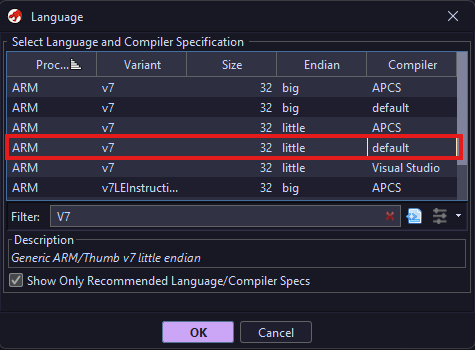
- If you’re working with a legacy LK (v1.0), select
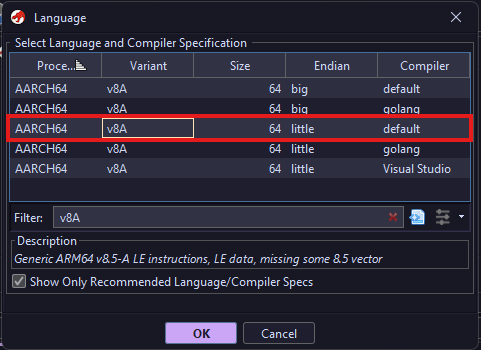
ARM:LE:32:v7:default, as it runs in ARMv7 mode. - If you’re working with a modern LK (v2.0), select
AARCH64:LE:64:v8A:default, as it runs in ARMv8 mode.
| ARMv7 (Legacy LK) | ARMv8 (Modern LK) |
|---|---|
 |  |
If selected correctly, it’ll look like this (the Language will differ if you’re dealing with a modern LK):
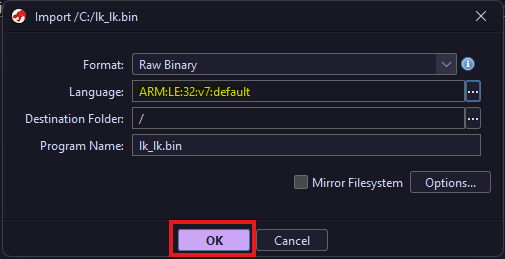
Simply click OK and wait for the file to be imported into the project.
Analyzing the Binary
After importing the file, it will appear in your project view. Double click it to open it in the CodeBrowser.
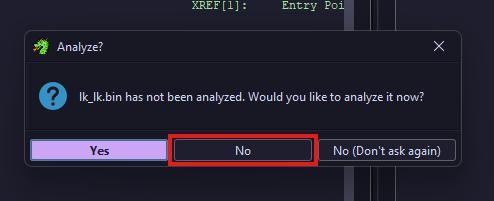
You’ll be prompted to run auto-analysis. It is important that you choose No here, as we still need to configure a few things first. Running it now will only cause confusion and make things harder.
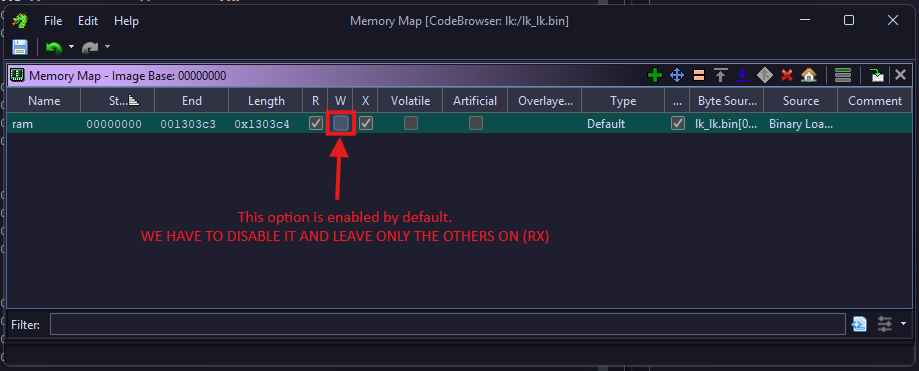
Since we chose not to run auto-analysis, go to the top menu bar and locate the icon that looks like a RAM stick. Click it to open the Memory Map window.
In the Memory Map, select the “ram” section and disable the “W” (write) permission, which is enabled by default. Only “R” (read) and “X” (execute) should remain enabled.
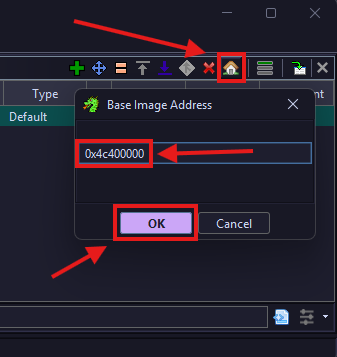
In the same window, locate the house icon, which opens the “Image Base Address” dialog.
Click it and set the base address to the Memory Address you noted earlier when extracting the binary with lkpatcher (e.g. 0x4c400000 or 0xffff000050f00000).
Click the Save icon in the top left corner to apply the changes, then close the Memory Map window and return to the CodeBrowser.
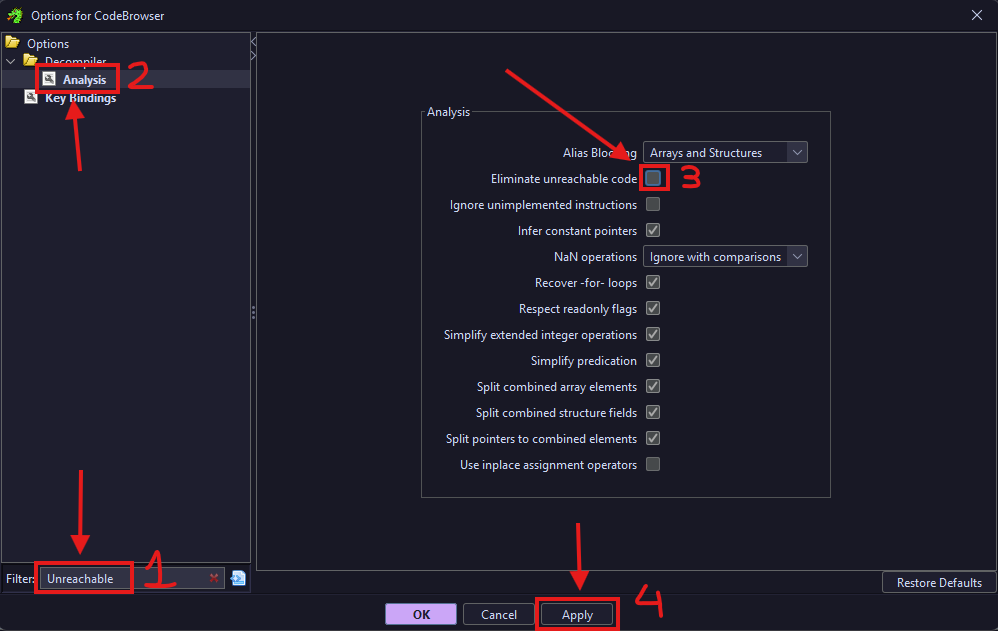
In the CodeBrowser, go to the top menu bar and click Edit > Tool Options to open the Tool Options dialog.
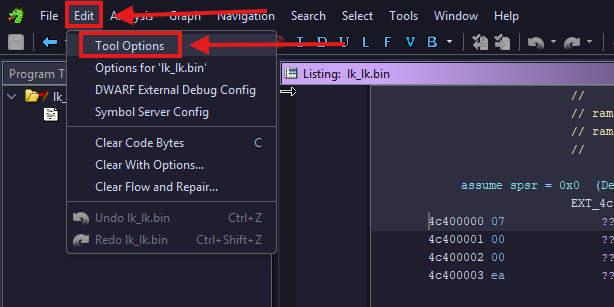
Search for “Unreachable”, then go to Decompiler > Analysis and disable the “Eliminate Unreachable Code” option (enabled by default). Click Apply, then OK to save.
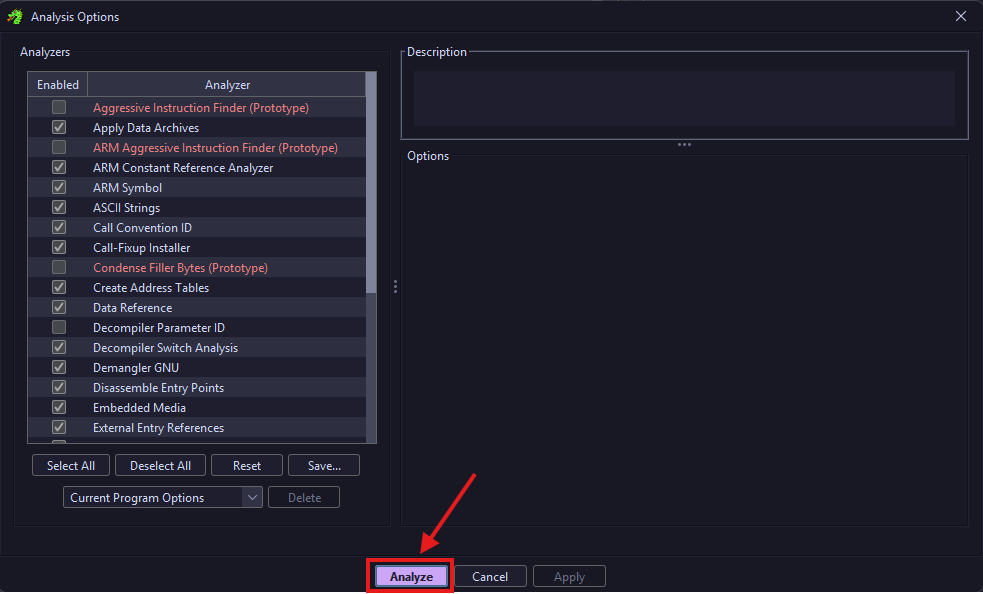
Finally, trigger auto-analysis by pressing A in the main CodeBrowser window. In the dialog that appears, leave everything as is and click OK.
If everything was done correctly, once the analysis finishes:
-
For legacy LKs (v1.0), in the listing (ASM) view you should see a vector table, and in the Decompiler view you should see an unnamed function that sets up the stack, BSS, and other sections.
-
For modern (v2.0) LKs, you won’t see a vector table, but you should still see the unnamed function that sets up the stack, BSS, and other sections.
| Legacy LK (v1.0) | Modern LK (v2.0) |
|---|---|
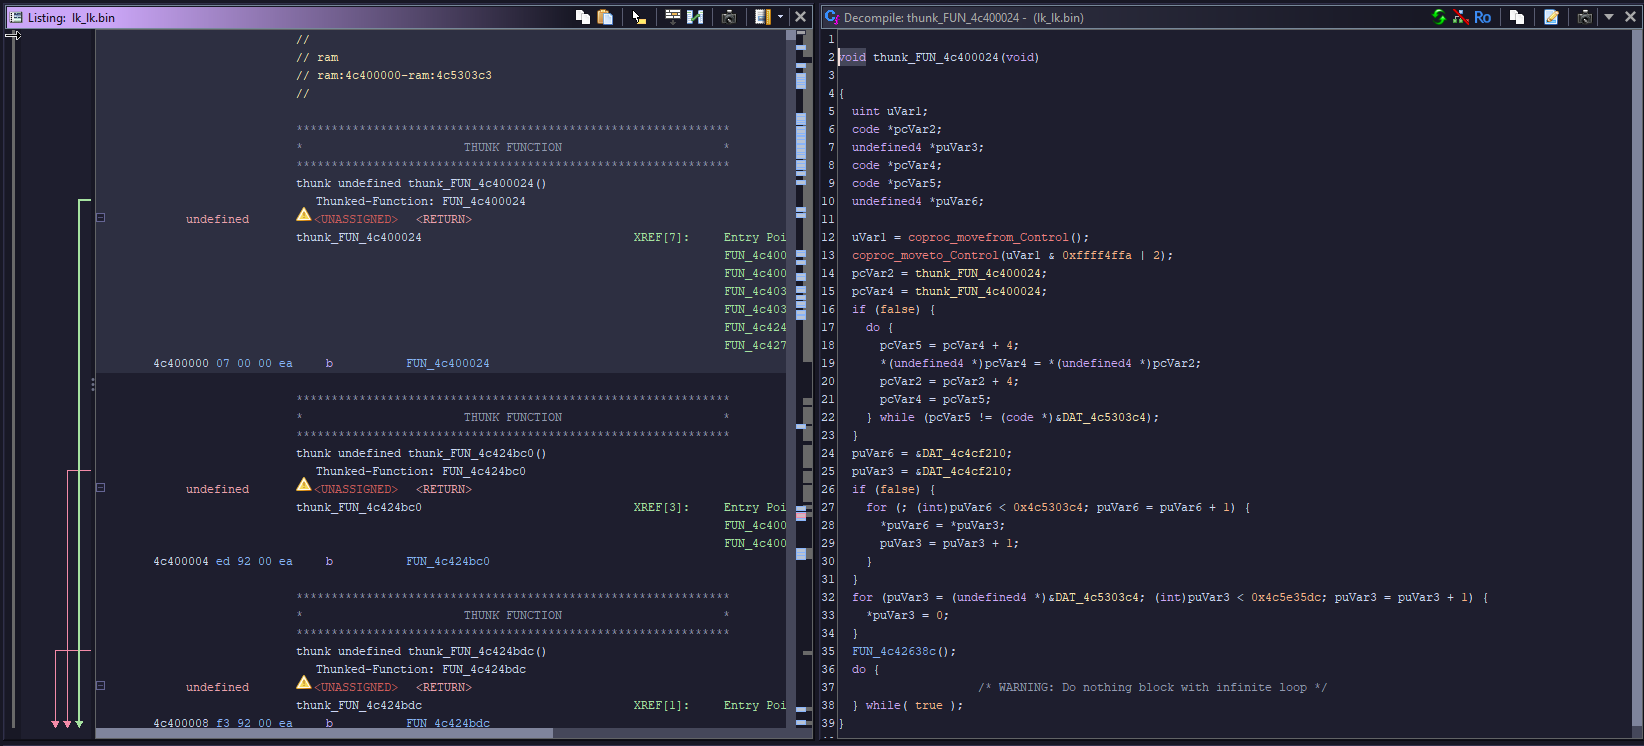 | 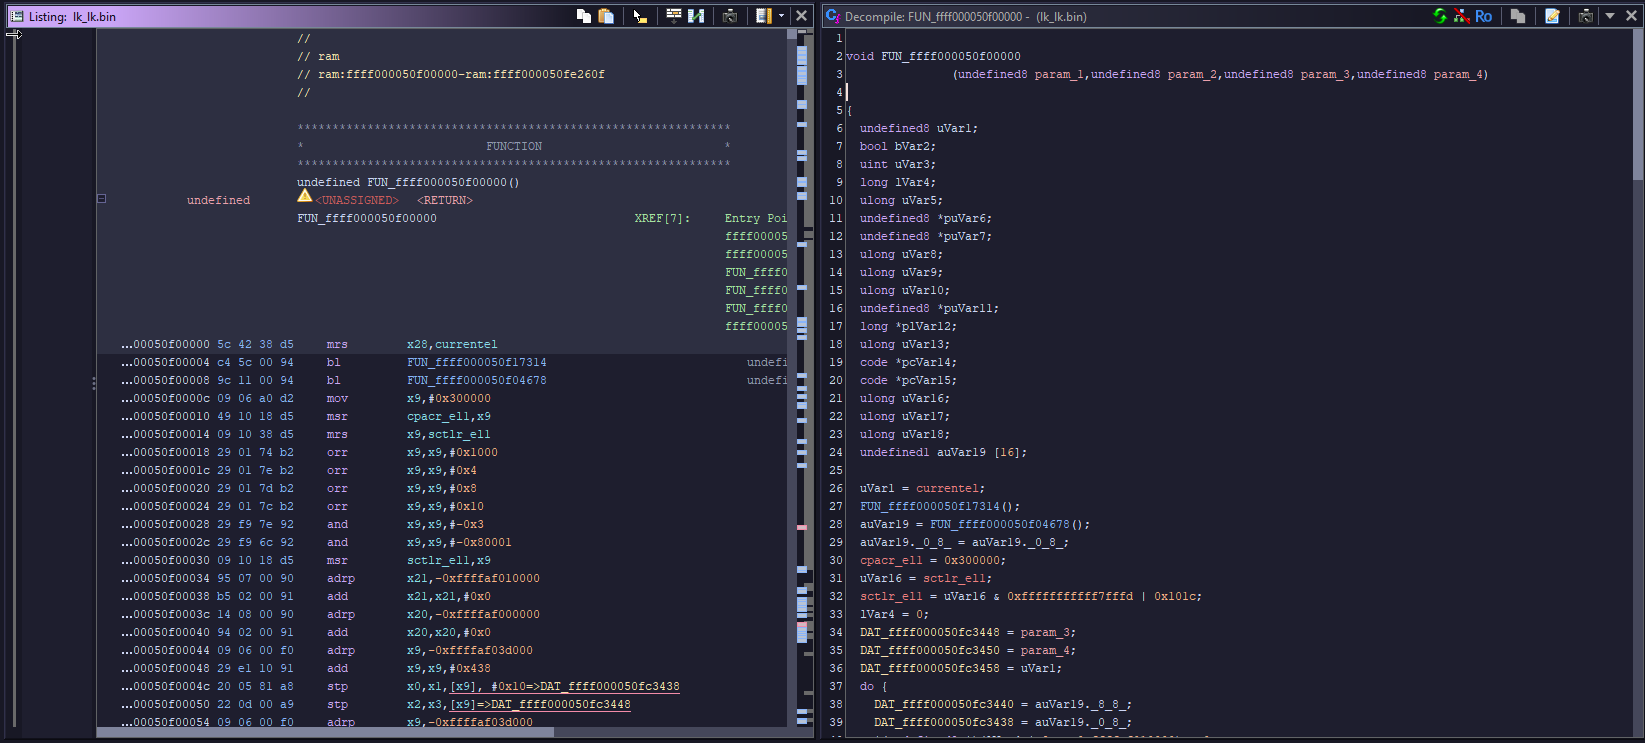 |
That should be it. This guide was meant to be concise, so there’s not much more to explain here. You should now have an easier time understanding what certain functions do and how the bootloader works.
ARMv8 Bonus: Ghidra Script
If you’re working with ARMv8 (modern) LKs, I have a Ghidra script that can speed things up quite a bit.
It automatically resolves and renames a number of commonly used functions (like lk_main, dprintf, fastboot_*, init functions, etc.), and also defines some basic structs and enums to make the decompilation output cleaner.
You can use it by doing the following:
- Add the script to your Ghidra scripts directory (via Script Manager -> Script Directories).
- Load and analyze your LK binary as shown above.
- Run the script from the Script Manager.
More details and the script are available in my GitHub repository.